Petcock and Fuel Filter
SAFETY FIRST: Protective gloves and eyewear are recommended at this point.
Removal
Drain the fuel, and remove the fuel tank. See the Fuel Tank topic for more information.
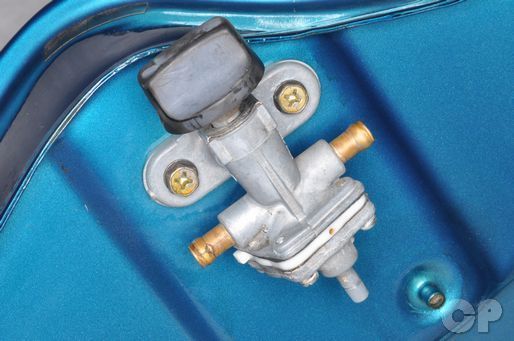


Loosen the two petcock mounting bolts with a 10 mm socket or a #3 Phillips screwdriver. Remove the bolts and washers.
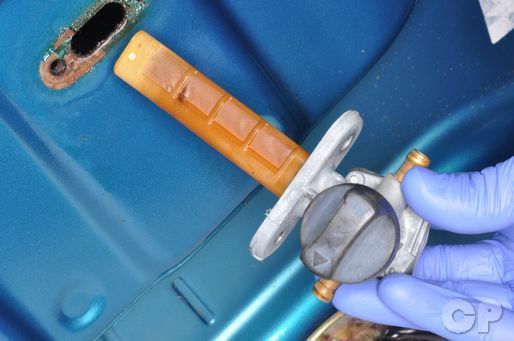
Remove the petcock from the fuel tank.


Remove the four petcock screws with a #2 Phillips screwdriver.


Remove the vacuum chamber cover and the spring.
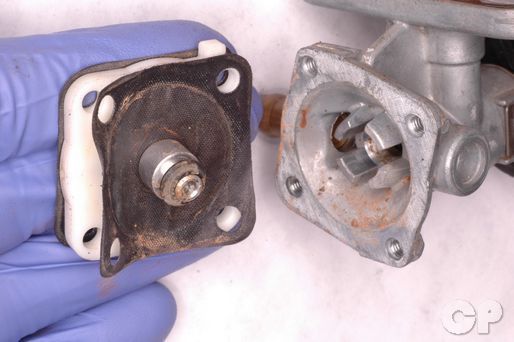
Remove the vacuum diaphragm from the petcock. Inspect the diaphragm, piston and piston seal for damage. Replace the components as necessary.
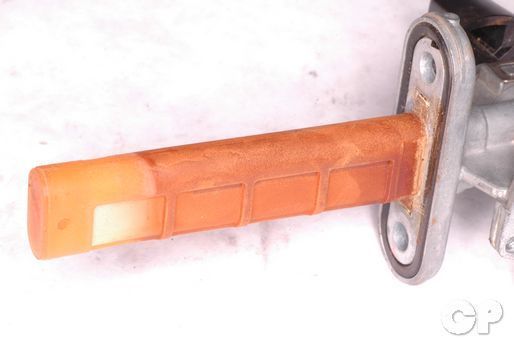


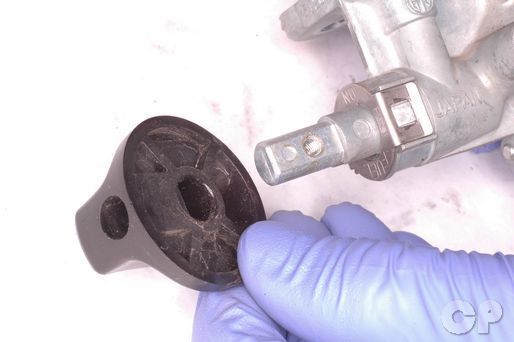
Inspect the petcock for damage and clogging. Check the fuel strainer for tears and foreign particles. Clean the petcock with a high flash point solvent and compressed air. Discard the O-ring at the base of the fuel strainer and replace it with a new item.
SAFETY FIRST: Protective gloves and eyewear are recommended at this point.
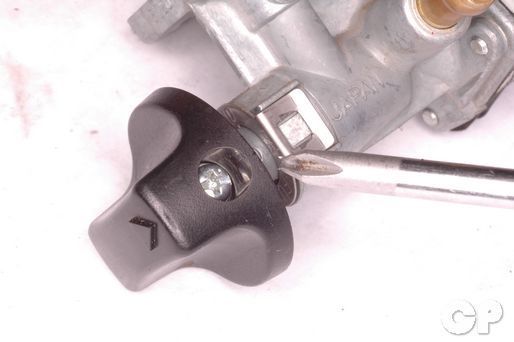


If you need to remove the petcock valve knob loosen its screw with a #2 Phillips screwdriver. Remove the screw, washer and knob.
Installation

Install the petcock valve knob. Insert its screw with washer and tighten the screw securely with a #2 Phillips screwdriver.
Place a new O-ring over the fuel strainer slide it down to the base of the petcock.

Install the diaphragm and piston into the petcock. Place the spring on the backside of the piston.
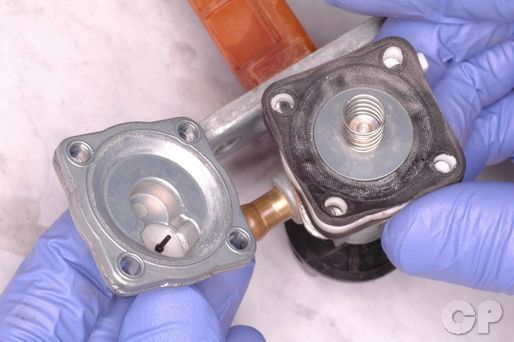
Install the vacuum chamber cover onto the backside of the petcock. Insert the four screws and tighten them securely with a #2 Phillips screwdriver.
Insert the fuel strainer into the fuel tank so that the petcock knob faces outside.
Insert the fuel strainer mounting bolts with new sealing washers. Tighten the bolts securely with a 10 mm socket or a #3 Phillips screwdriver.
To install the fuel tank see the Fuel Tank topic.
Copyright - Cyclepedia Press LLC

Note: If you are viewing this document offline be sure to visit the latest version online at http://www.cyclepedia.com before attempting any repairs. Updates are made without notice.